
In WORK there are three different types of users.
- Admins have full access to the Admin Portal. They are usually the ones adding clients, scheduling and dispatching jobs, and editing the settings for your company.
- Restricted Admins have limited access to the Admin Portal. They may be doing the same tasks as some of your admins but don’t have full access to all of your company information or settings, based on the permissions you set.
- Fieldworkers are out in the field using the Fieldworker App to perform jobs.
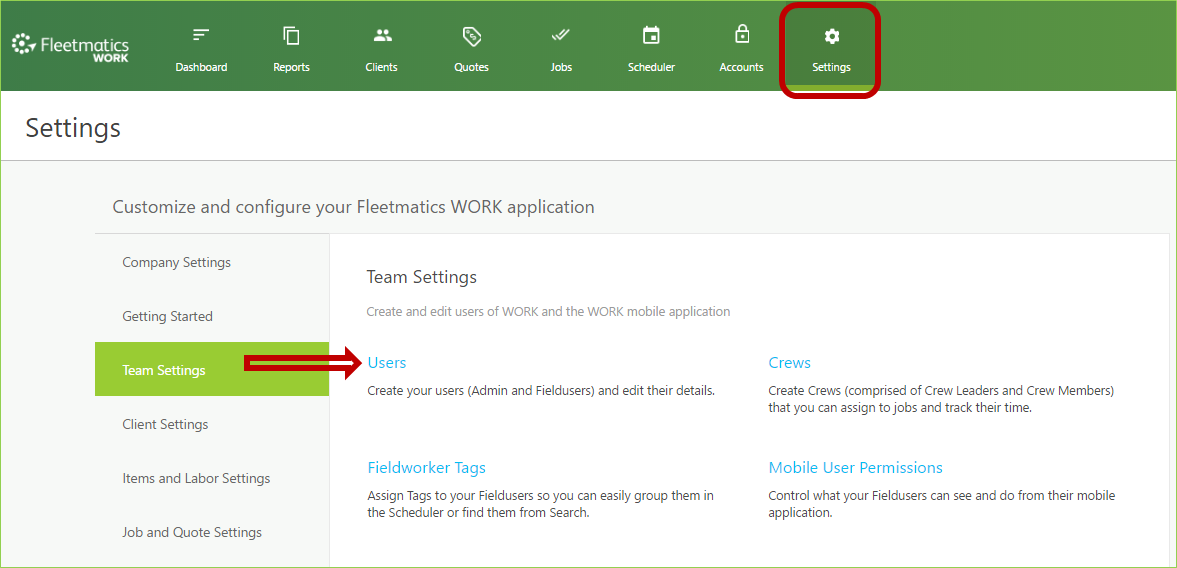
All three of these User types can be added from your Settings. To add and edit users you will want to go to Users under Team Settings.
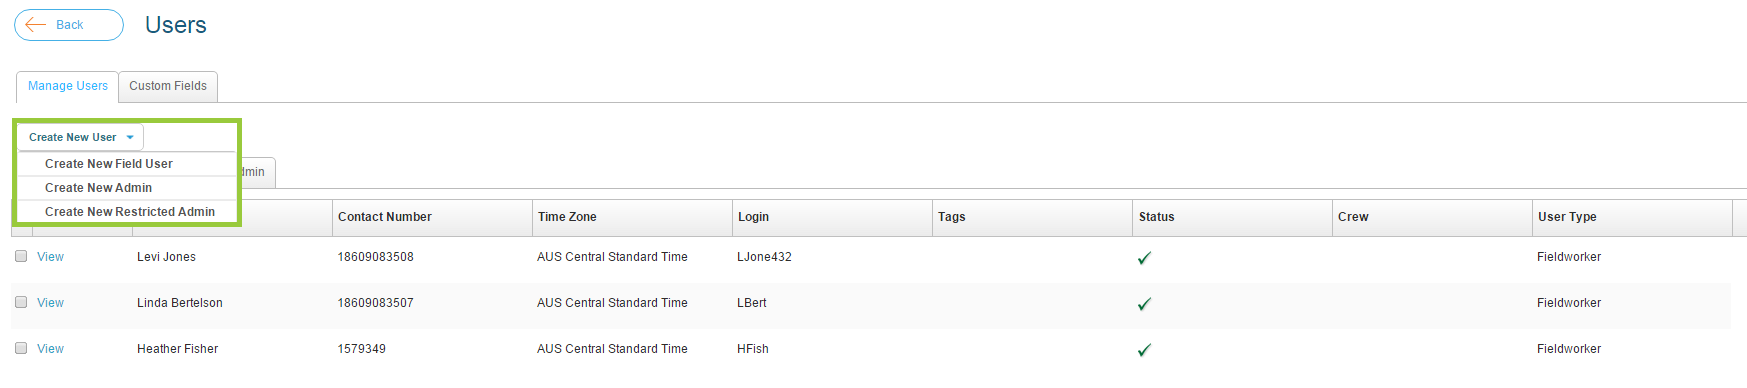
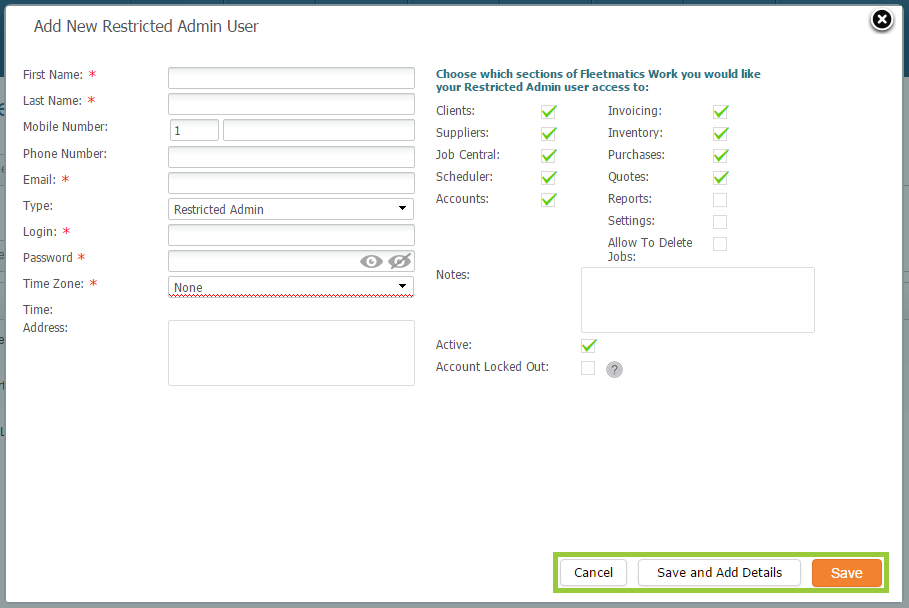
After navigating to the Users Page click Create New User in the upper left and select Create New Restricted Admin.

This will bring up the Add New Restricted Admin User window. This is where you will enter your admin’s information. You are required to add a First Name, a Last Name, an Email, a Login, a Password, and select a Time Zone. The Login and Email should match.
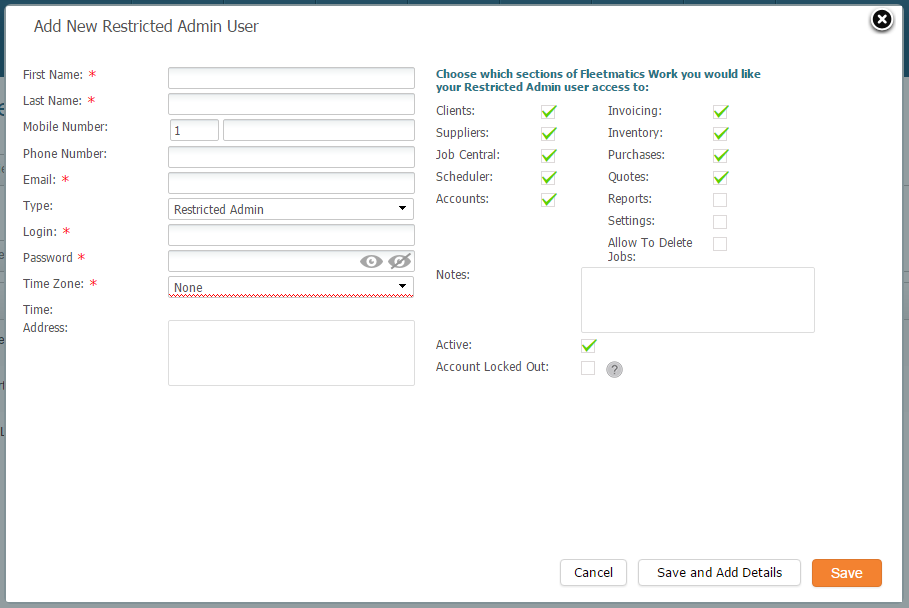

You can toggle to see or hide the password with the eye and crossed out eye buttons in the Password field. This is for convenience only and your password will not be shared with others.


After you have entered all of your user’s information you will want to Choose which sections of Work you would like your Restricted Admin user access to. You can select from each section of WORK to give and restrict a Restricted Admin’s access to various sections of your WORK account. To select or deselect a section, click the checkbox next to the name of that section.
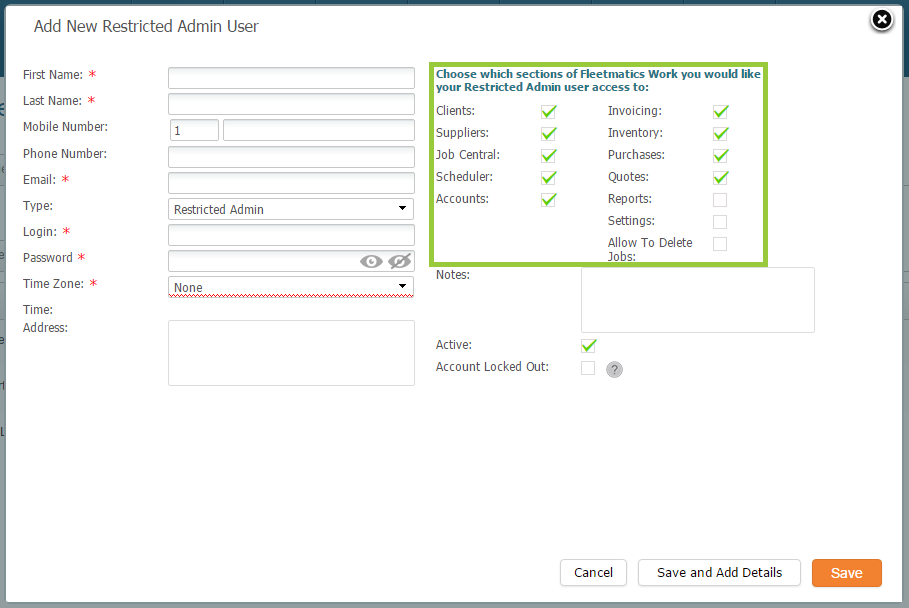

*We do not recommend leaving Allow To Delete Jobs on at all times to avoid accidentally deleting jobs.
**Remember that these options are stacking. In order to be able to properly use a section of WORK the admin must have access to all sections with related information. For example, if you want a Restricted Admin to be able to create Jobs for new Clients, they need to first have access to Clients in order to do so.
After you have made your selections click Save, which will bring you back to the Users page. You can also click Save and Add Details which will bring you into the users Restricted Admin window.

At the top of the Restricted Admin page, there are a number of tabs.


- Details is where you can view and edit the user information.
- Custom Fields is where you will find any User Custom Fields you have created in the system. *The User Custom Fields are only viewable from the user details window.
Please Note: User Custom Fields are not available to customers who purchased after September 15, 2015.
- Leave Details is where you can add and view the times that your user is on Leave. Please see scroll down in this document to learn more on Leave.
- Documents is where you upload documents that pertain to your users. Please scroll down in this document to learn more about Documents.
- Audit History is where you can keep track of who creates and edits the User.
On the Details tab of the Restricted Admin window there are 2 check boxes
- Active which will activate or deactivate the user. If this is checked off the user is Active. *This feature is only available for customer who signed up before January 19th


- Account Locked Out which will allow you to unlock a user’s account if they are locked out because of failed attempts to log in.


Once you are satisfied with the edits you have made to the user you can click the orange Save button in the lower right.
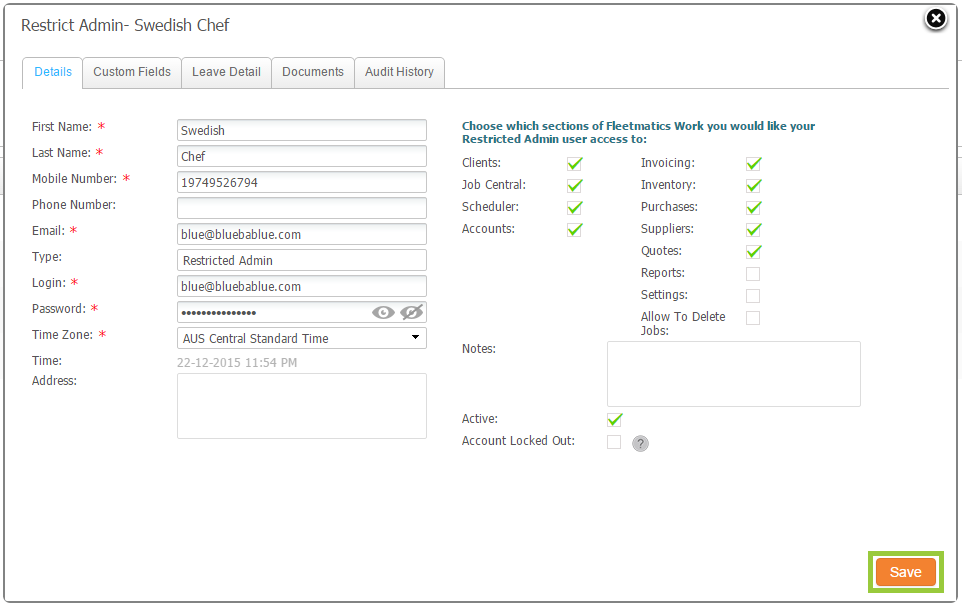

You can access the User Information screen again by clicking View next to the User’s name.


Comments
0 comments
Article is closed for comments.