
New to WORK? Watch our Getting Started video.
Or, view these 3 simple steps
STEP 1: CREATE A CLIENT
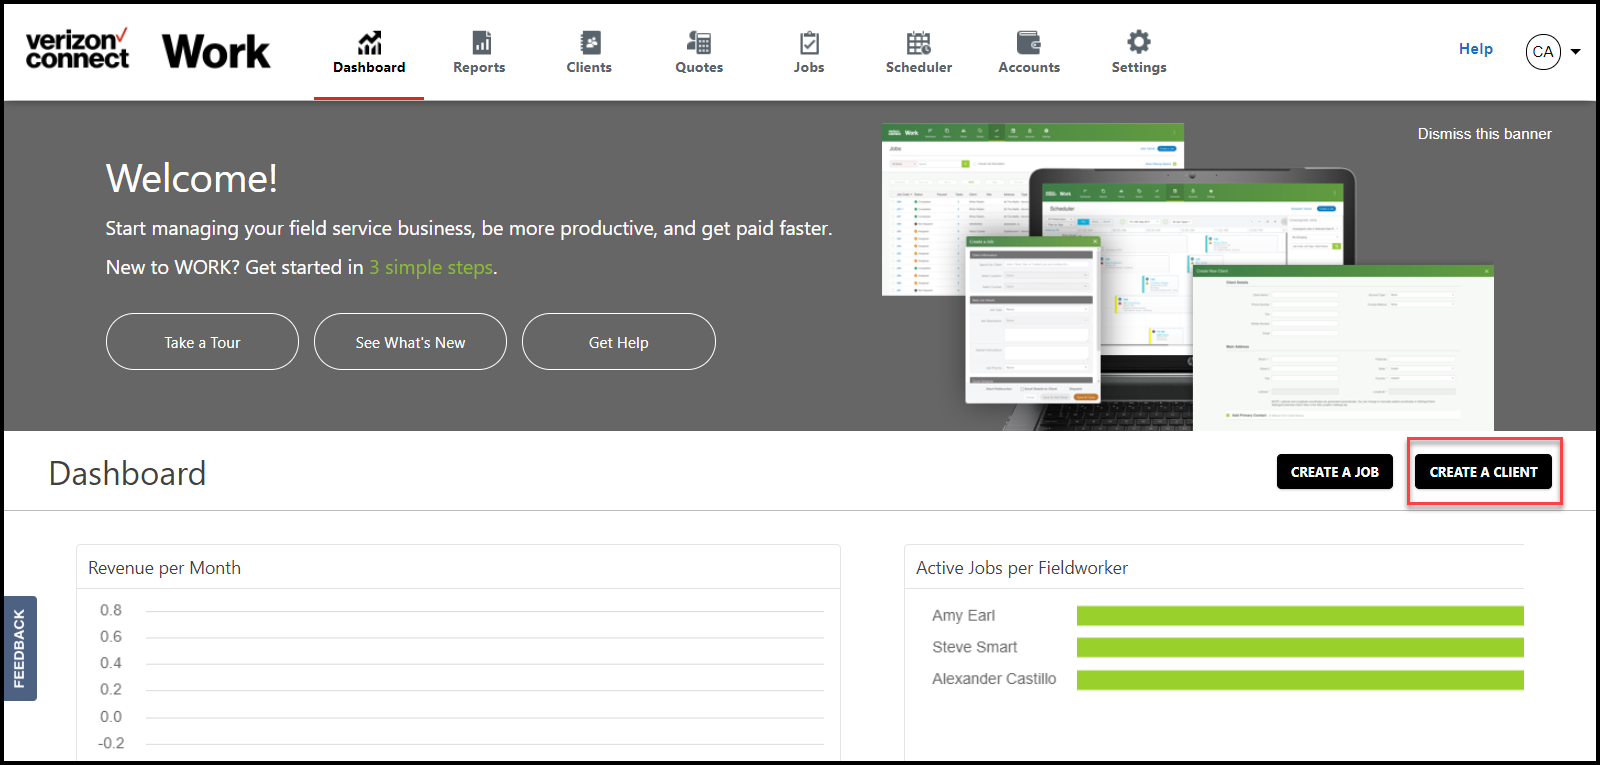
After you've completed your profile, you'll see the WORK Dashboard.
From here, select Create a Client.
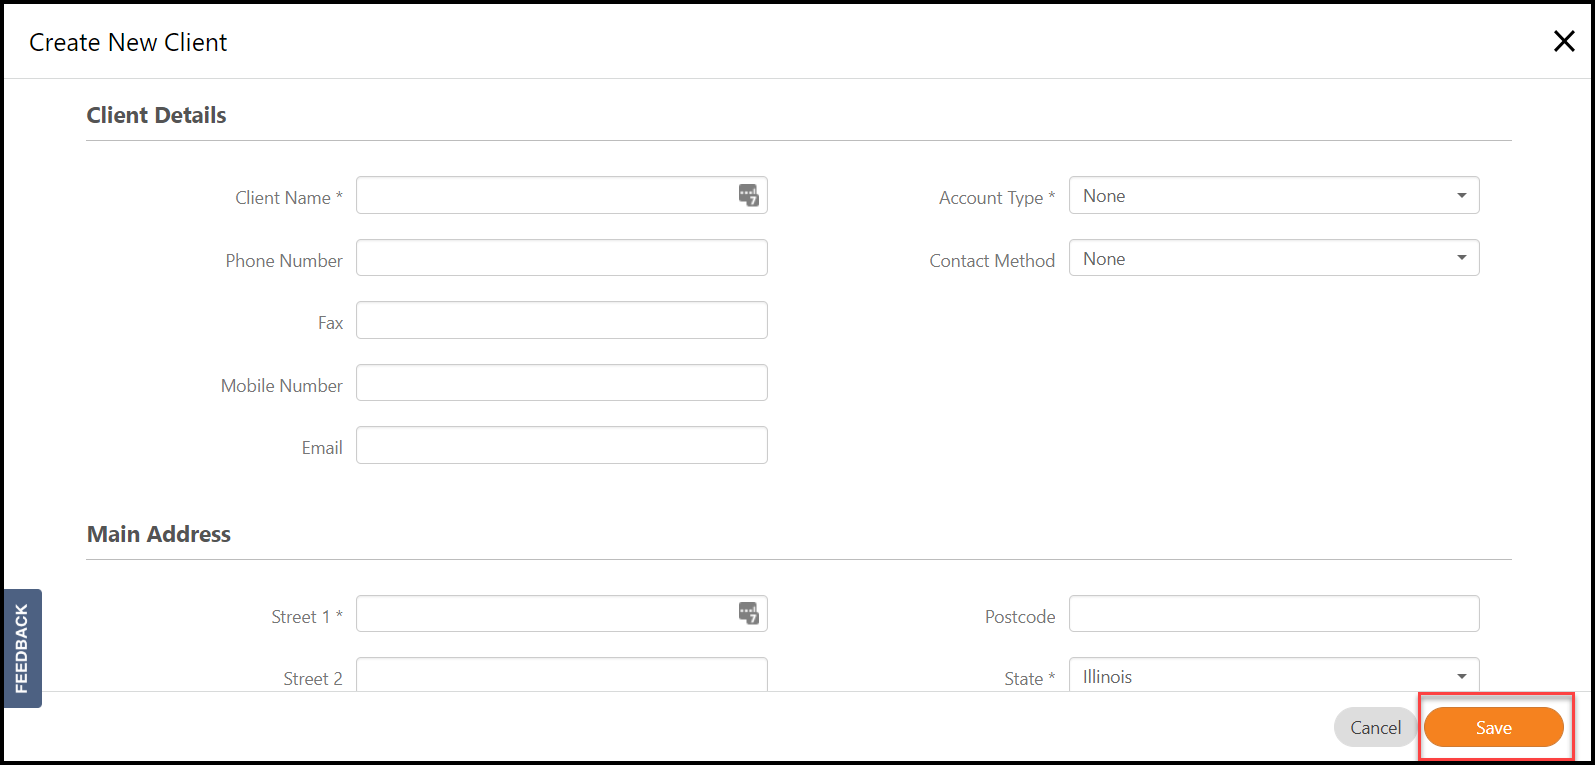
Simply add your client's contact information and details. Then, click Save.
STEP 2: CREATE A JOB
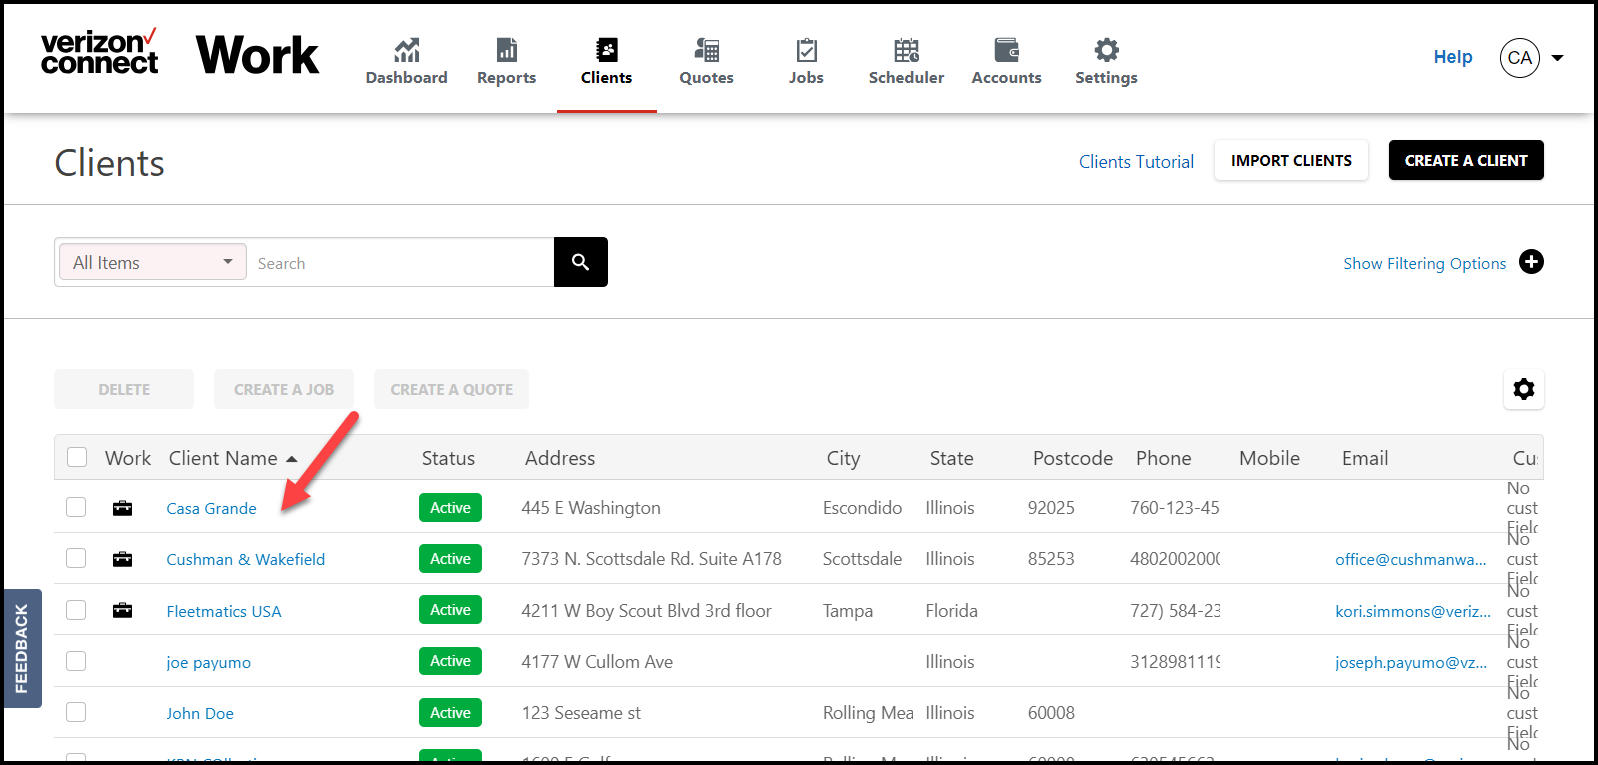
From the Clients List, select a client's name.
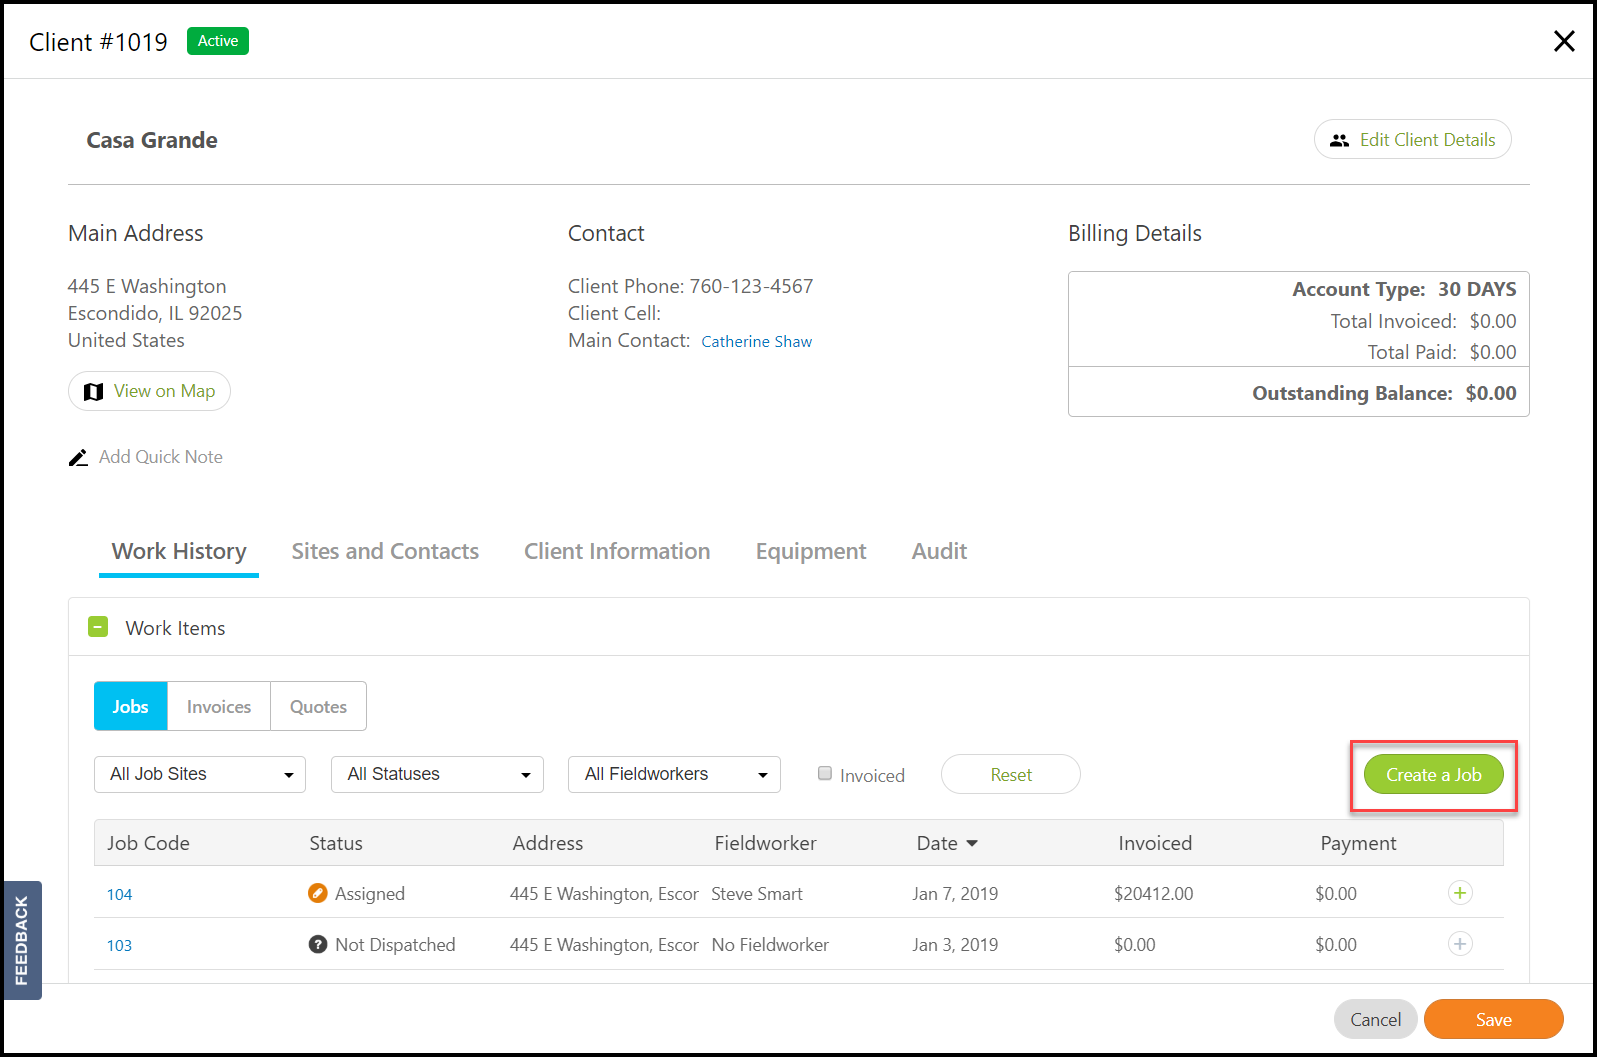
From the Client Record, select Create a Job.
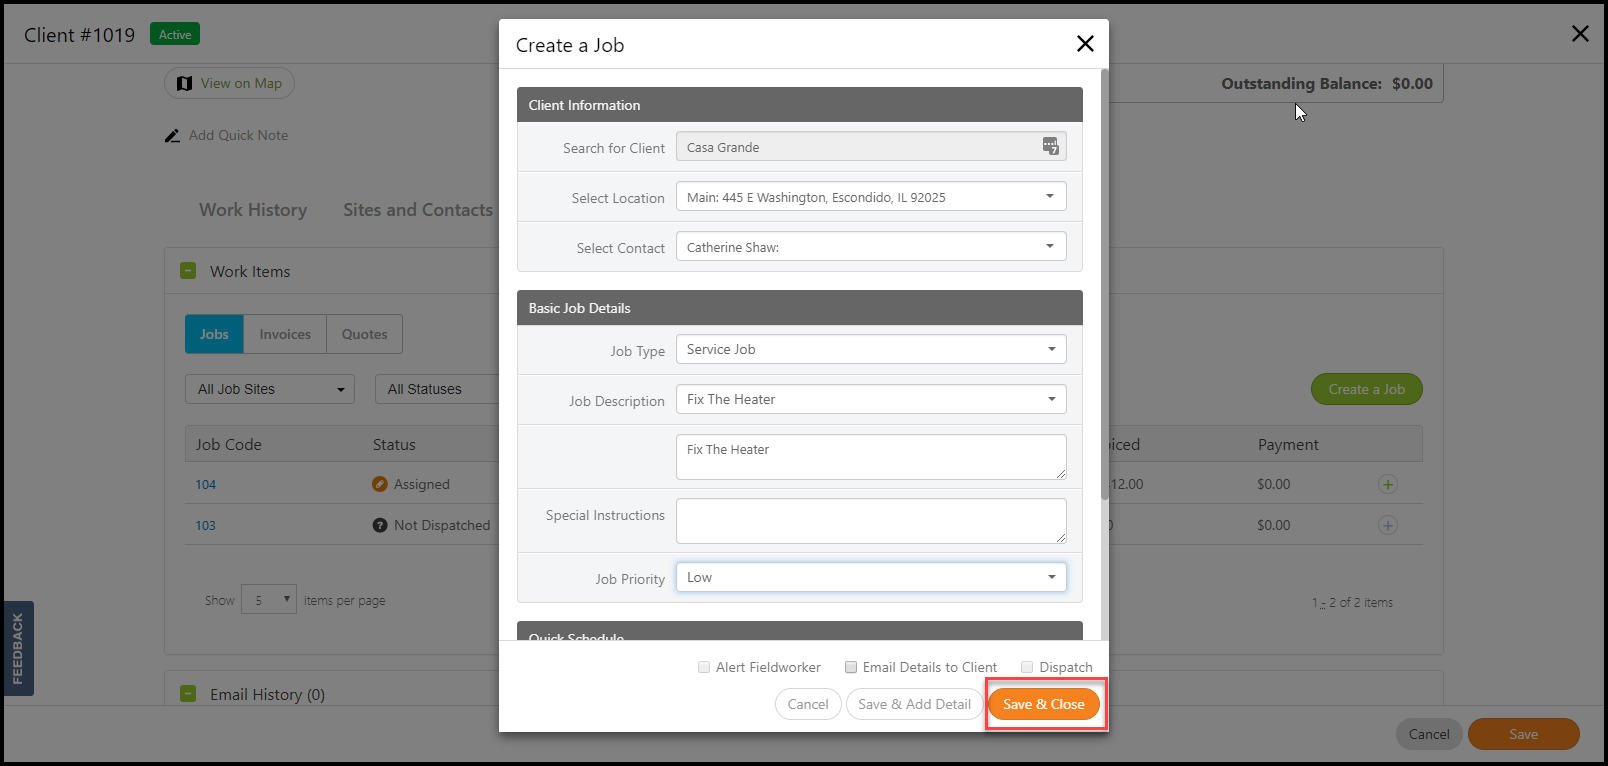
Fill in the basic job details, schedule it, and dispatch it to a Fieldworker. Then, select Save & Close.
Note: Don't forget to check the boxes "Alert Fieldworker" and "Dispatch". Your Fieldworkers will be alerted of the job via the mobile app.
STEP 3: VIEW & MANAGE JOBS ON THE SCHEDULER
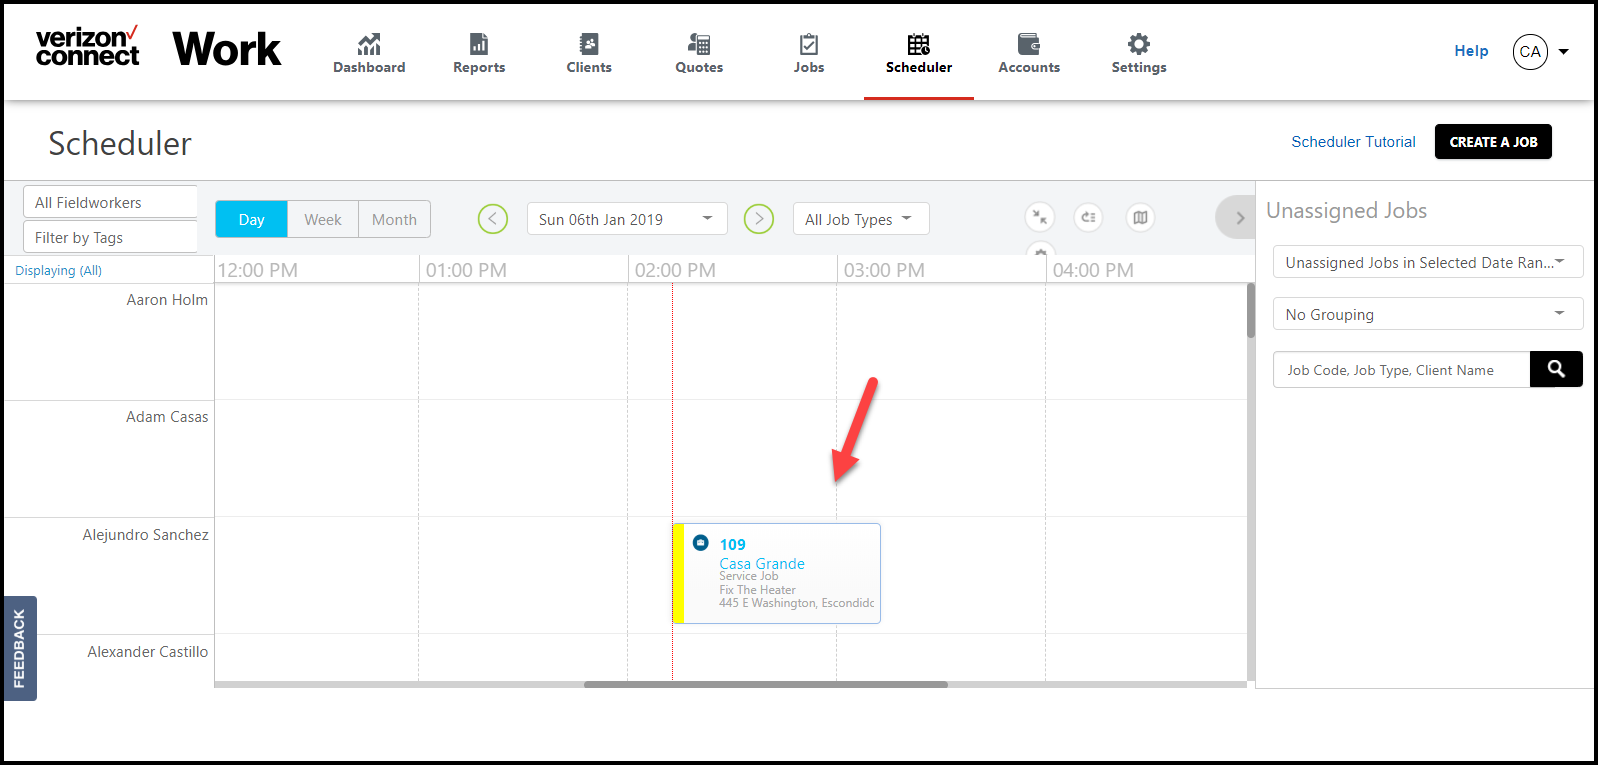
After the job has been successfully scheduled, an Admin will see this Job on the Scheduler.
Drag-and-drop the job on the calendar to re-arrange your schedule.
Note: When you update a job, your fieldworker is alerted of the change.
WHAT'S NEXT?
Get the Fieldworker Mobile App and have fieldworkers record notes, upload photos, documents and signatures right from the job site.
Comments
0 comments
Article is closed for comments.